Skip to content

Marker making and cutting

Automatic marker making, from pattern to cutting

Nesting takes the pieces from the CAD and the quantities from the production lot, looks for the shortest marker and sends the result to the plotter and the cutting machine. The real consumption goes into the bill of materials and the material requirements.

Book a demoFree Fashion HPGLFix (in Italian)

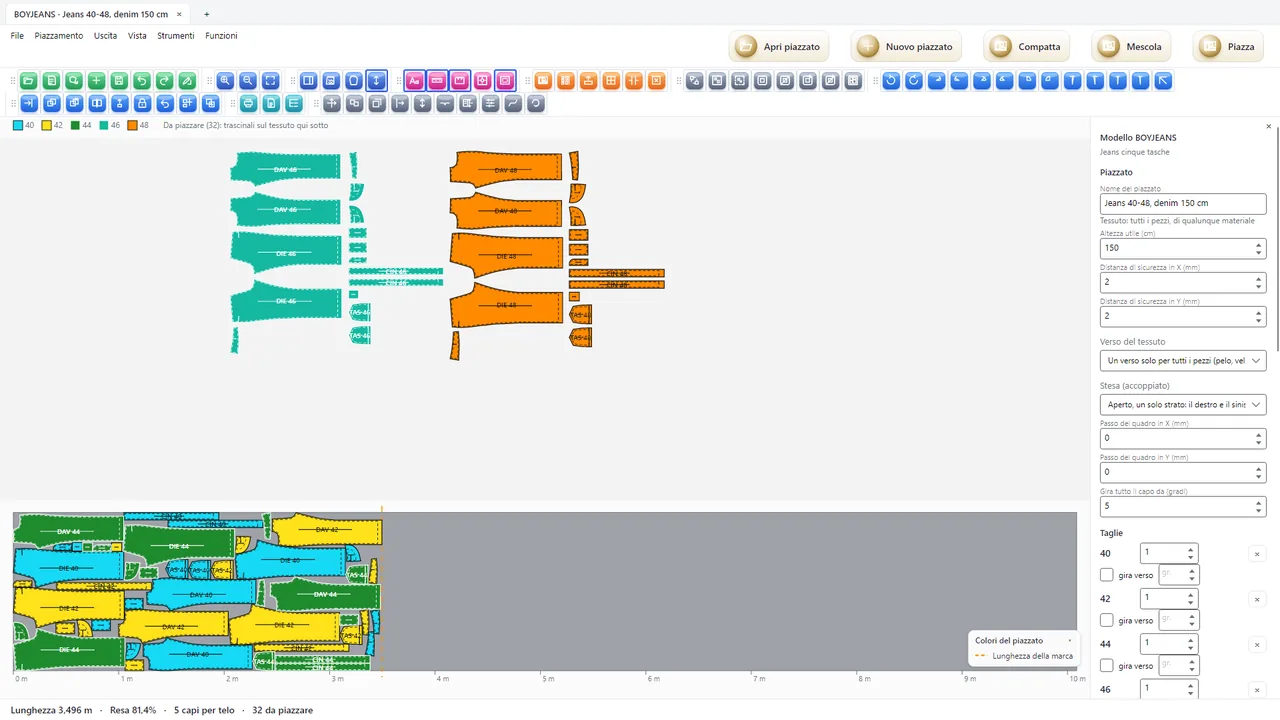
The marker of a jean in five sizes on 150 cm wide denim: the pieces to place at the top, the marker coloured by size at the bottom, with a length of 3.473 metres and an efficiency of 81.9 per cent

The engine that looks for the shortest marker

Automatic, against the clock

You choose how much time to give it: the engine tries thousands of layouts, shortens the marker by taking pieces out and putting them back, and keeps the best one. You can stop it whenever you like and keep the best result.

Never worse than before

The engine starts again from the best marker already saved for the same style, fabric and width.

On the server, even overnight

Send the nesting job to the server, up to 12 hours of work, and switch off your PC: when it has finished you get a reminder, look at the result and approve it.

By hand, when needed

Drag the pieces, turn them with a double click, nudge them with the arrow keys by 1 mm, 10 mm or 0.1 mm. The background marker and the per-size duplicate help you redo it quickly.

The fabric as it really is

  • Fabric direction: one way for all pieces, one way per size, or free; sizes turned by 180° where allowed.
  • Open or folded spread (face to face), with half pieces placed opened out.
  • Checks and stripes: the matching points of the pieces fall on the same check of the fabric.
  • Shrinkage along the grain and across, piece by piece if needed; maximum tilt set per fabric.
  • Buffers between pieces, protection around notches, splice line and start limit.
  • The constraints are saved in the fabric record and apply to new markers.
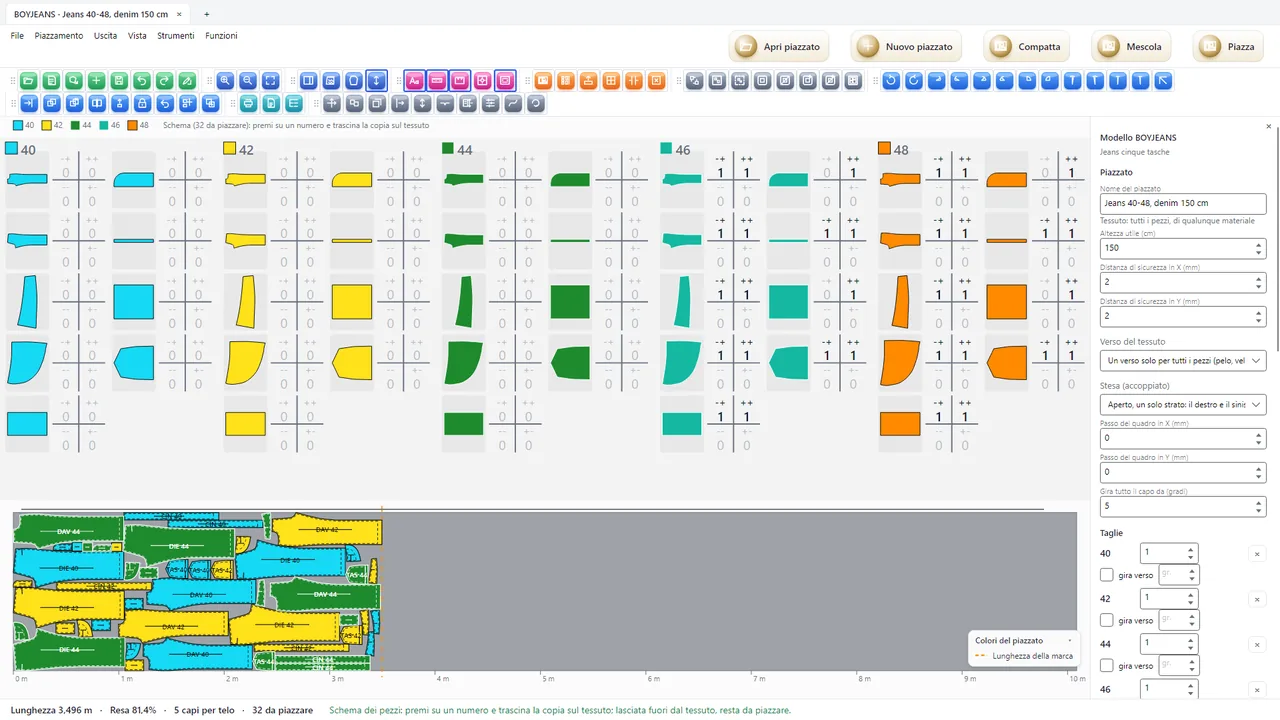
The scheme of the copies to place by size, with the flipped versions of each piece, and on the right the marker data: usable width, buffers between pieces, fabric direction and type of spread
The scheme of the copies by size, with the flipped versions.

From the production lot to the cutting table

  1. The lot suggests the size ratio and the plies from the garments to be produced, with no more garments per ply than you decide.
  2. The cut order plan fits the lays by colour within the length of the table and assigns fabric rolls from the same dye lot.
  3. Plotter and cutting machine: HPGL and ISO files, with the cutting sequence and shared edges cut only once.
  4. The garments actually cut go back into the lot, and the metres used are taken off the fabric rolls.

Already have a CAD? Try Fashion HPGLFix for free

Fashion HPGLFix is free: it fixes the step of HPGL files from other CADs, shows them on the paper together with ISO cutting files and puts two markers side by side on the same paper so none is wasted.

Download Fashion HPGLFixThe pattern-making CAD

The download page is in Italian.